Filter by Topics
KML, or Keyhole Markup Language, is used to display geographical layers on Google Maps. In this guide, we’ll show you how to create a KML file using Google Earth and how to easily display it on Google Maps using our WordPress Plugin.
Download A Sample KML File
To understand the structure of a KML file or use this sample KML in your project, download sample kml file.
To verify the output of your KML file, you can use this free kml viewer tool.
Create a KML file using Google Earth
Below are the simple steps to create a kml file using google earth.
Go to Google Earth and search your location.
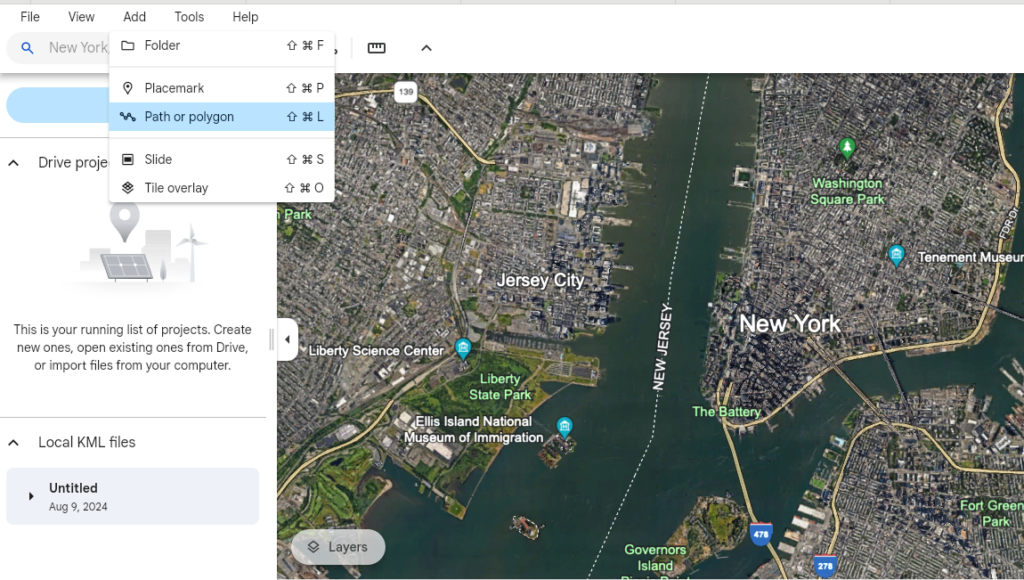
To add a path or polygon, Click on Add menu at the top and select Path or polygon menu item.

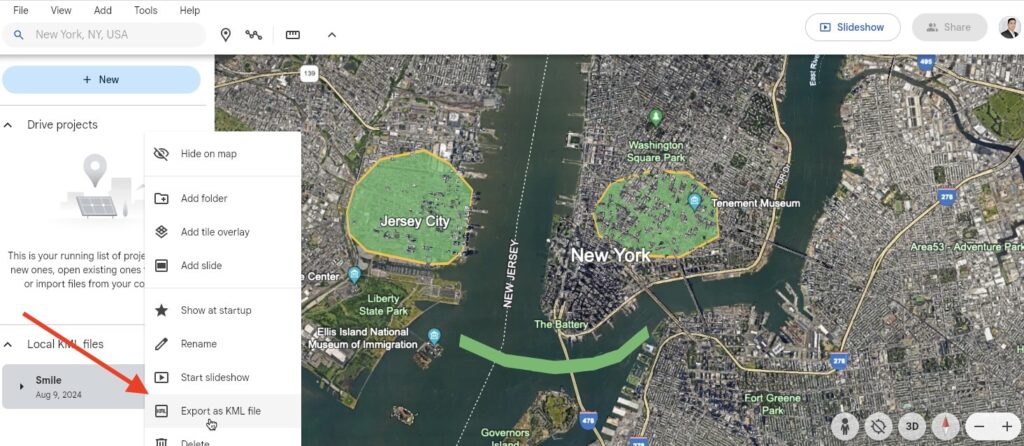
Draw your polygon and setup visual properties. e.g opacity, fill color.
On the left bottom, Under the Local KML Files, click on three dots menu and choose the Export as KML File. You can create multiple KML files for each drawing or use a single KML file for all drawing.

Save the KML file and you can use this KML file in your project. use the above mentioned kml viewer to check your downloaded kml file output.
Below are the steps to use our wordpress map plugin to show kml file on google maps on your WordPress website.
Include Kml/Kmz file
Step 1 Go to Add or Edit Map page and scroll down to ‘Layers Settings’ section.
Step 2 Mark checked Kml/Kmz Layer option.
Step 3 Enter the full URL to the KML file you uploaded. You can display multiple kml layers on google maps by inserting comma(,) separated kml urls.

Step 4 click Save map to allow the layer added to your map.


