Filter by Topics
In WP MAPS PRO v5.0+, you can apply ready‑made info window skins and fine‑tune the design with a built‑in editor. Customize font family, size, color, alignment, spacing (margin/padding), and even set background colors or images for a polished, on‑brand look.
Apply a Skin to a Location Info Window
Step 1: Go to WP MAPS PRO → Add Map or Manage Maps → Edit Map.
Step 2: Scroll to the Infowindow Message for Locations section and choose a Skin from the list.

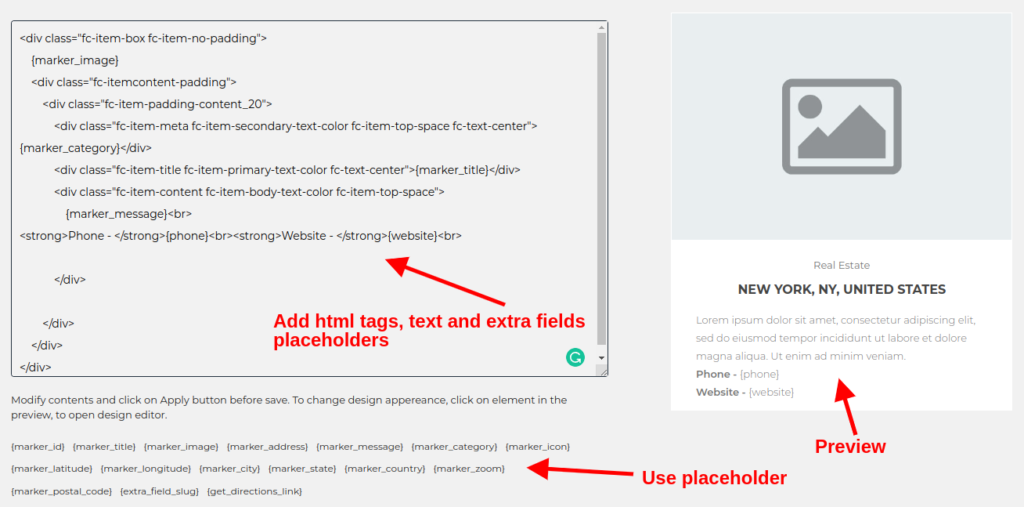
Step 3: Use the left‑side editor to edit HTML, add content, and insert placeholders (e.g., extra fields). Click Apply Changes to preview.

Step 4: Click Save Map and check the frontend to see the updated design.
Customization Tips
- Typography: Set font family, size, weight, and alignment for titles and body text.
- Branding: Apply background colors or a background image for consistent branding.
- Spacing: Use margin/padding controls for clean, readable layouts.
- Dynamic Data: Insert placeholders (e.g.,
{title},{address}, your extra fields) to auto‑populate content. - Preview Often: Use Apply Changes before saving to confirm your styling.
Need Help?
If you have questions or need styling guidance, visit our
Support Center.

