Filter by Topics
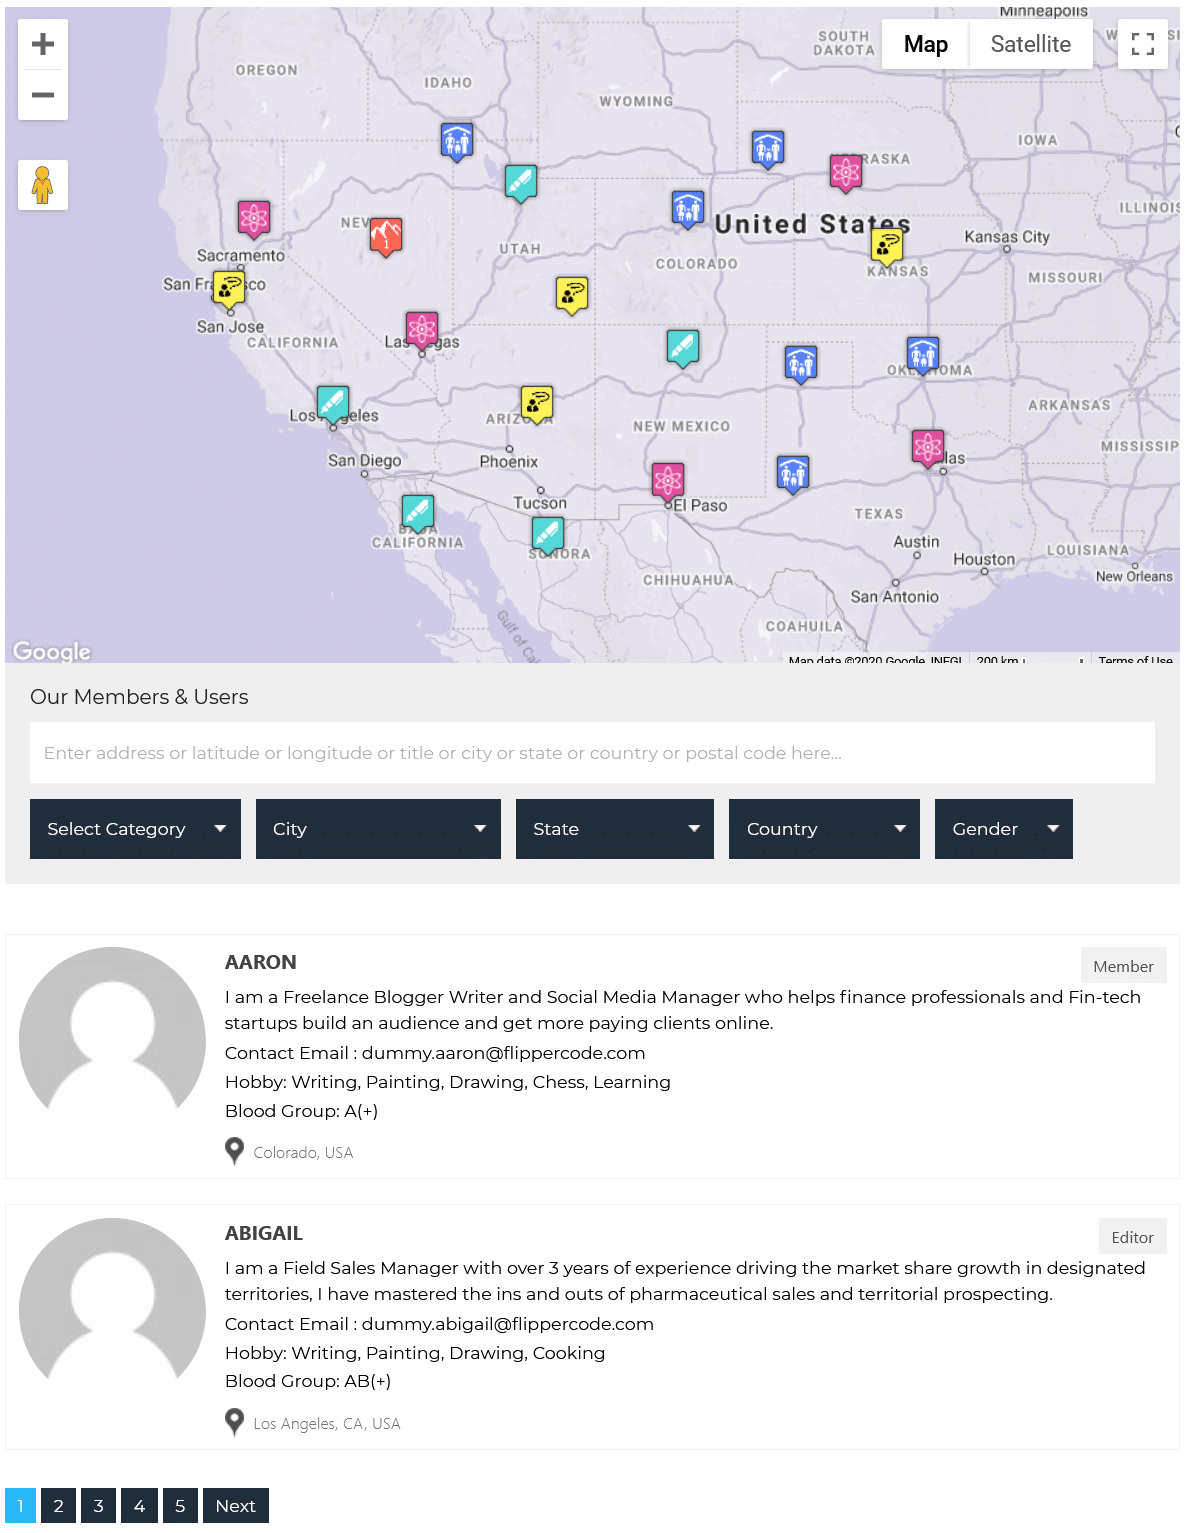
With this User Locations On Google Maps extension, you can beautifully display the current locations of WordPress users on Google Maps.
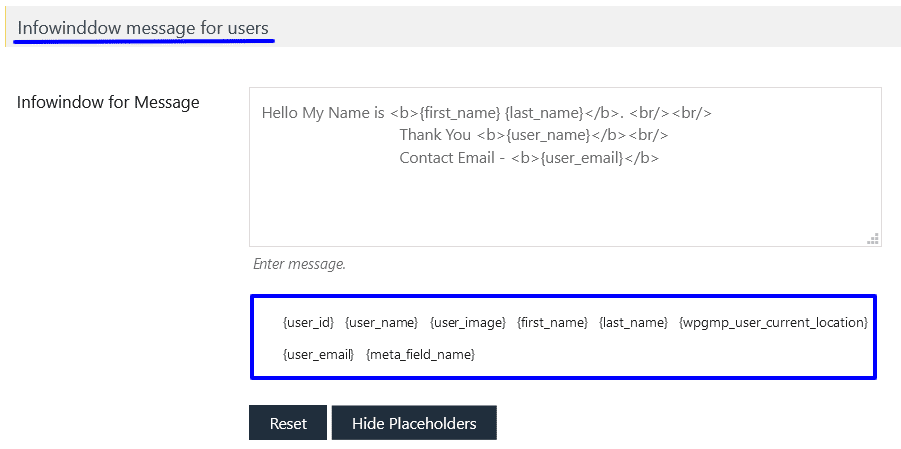
All the user information displayed in the info-window and listing is dynamic and can be managed with the help of placeholders from the back-end.
Please make sure you have installed the WP MAPS PRO plugin and the User Locations On Google Maps
extension on your website. If you haven’t installed them yet, please download and configure these plugins first.
Display User’s Current Location on Google Maps
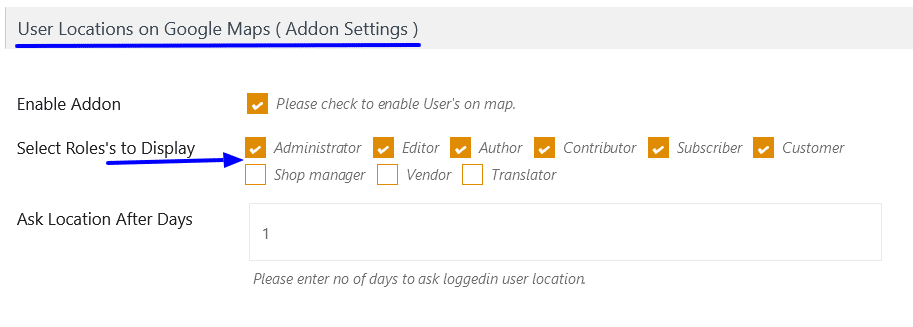
Step 1 Navigate to Add or Edit Map and scroll down to the “Users Location on Google Maps (Addon Settings)” section.

Step 2 Enable the “Enable Addon” checkbox in this section.

- Select Roles to Display: Choose the user roles you want to display.
- Ask Location After Days: Enter the number of days after which to ask a logged-in user for their location again.
Step 3 Click the Save Settings button.
On the map page, a browser location permission popup will appear. Click Allow to display your current location on the map.
Note: The SSL layer must be enabled (HTTPS) on your site for the location access popup to appear.

Display Selected User Role on Map
Step 1 Navigate to the “Select Roles to Display” option in the same settings section.

Step 2 Select the roles you want to display.

Step 3 Click the Save Settings button. Now, all logged-in users with the selected roles will be displayed on the map.

Manage Infowindow Message for Users
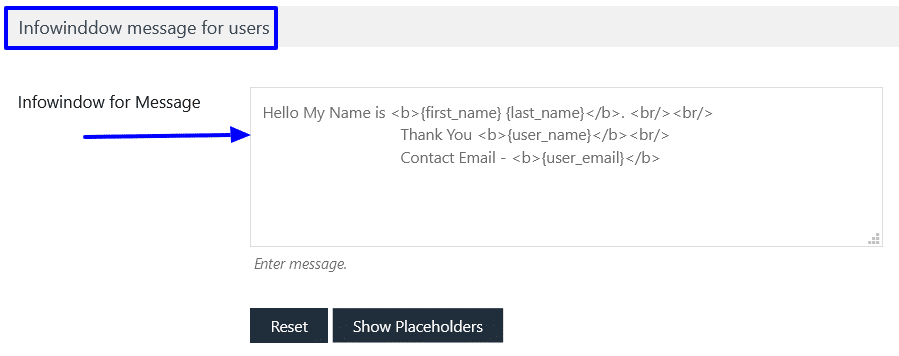
Step 4 Navigate to the “Infowindow Message for Users” section.
Step 5 Enter your desired text in the “Infowindow for Message” textbox.

Step 6 Click the “Show Placeholders” button to see available placeholders you can use in your infowindow.

Step 7 Click Save Settings.
You can see a working demo here.

